Setting up a Direct Ethernet Connection using a USB to Ethernet Adapter
KB0166: Setting up a Direct Ethernet Connection using a USB to Ethernet Adapter
In some cases a network connection to your main router is not close or convenient, and the direct USB cable
connection will not work properly.
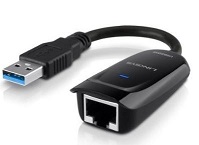
A reliable and easy solution is to install a USB to Ethernet adapter. This creates a one port
network connection between the clock and a USB port on your PC or MAC. This device can be purchased at your local
office or computer supply store, or on amazon.com.
NOTE: Some models may come with a driver CD. Make sure to follow the manufacturer’s instructions
to install the drivers first.
Solution:
1. Connect the Ethernet cable to the port on the bottom of the clock and the port on the adapter.
2. Plug the USB connection of the adapter into your computer. Windows should recognize the connection
and the Ethernet port connection lights should activate underneath the clock.
3. If you are using Windows, go to the Command Prompt to verify the IP address of the new connection.
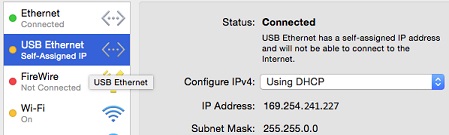
NOTE: Apple MAC users can select the Apple Icon\System Preferences\Network and the “USB Ethernet” option to
view the new network settings described below.
Using Windows 7, Vista, or Windows 10:
1. Click on the Windows Start icon on the task bar.
2. In the Search programs and files.. window, type: cmd
3. Press Enter on the keyboard to go to the Command Prompt.
Using Windows 8:
1. Click on the Search (magnifying glass) icon on the task bar located on the right side of the desktop.
2. In the Search Apps window, type in the letters: cmd
3. Press Enter on the keyboard to go to the Command Prompt.
At the Command Prompt type >ipconfig –all
Press Enter to review the Ethernet adapter Local Area Connection Settings:
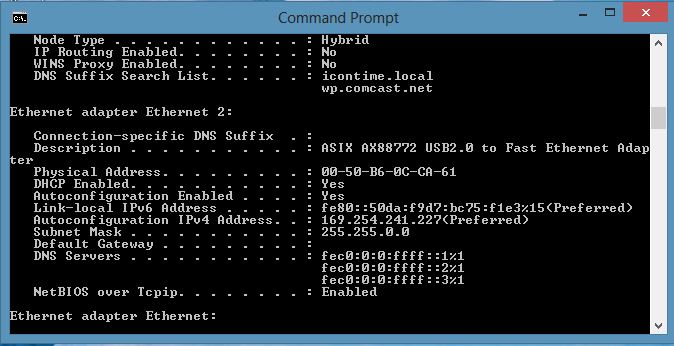
In this example, the IP address of the computer is 169.254.241.227 and the subnet mask is 255.255.0.0
4. Assign the IP Address and Subnet in your Clock.
a. Choose an available IP address.
b. The first 9 digits of the clock’s IP address must match your computer’s IP address, exactly.
c. The last 3 digits of your clock’s IP address must be different.
Using the example above, we will assign the clock’s IP address to: 169.254.241.230.
a. Enter into Supervisor Mode at your employee time clock terminal.
b Press the padlock key on the time clock.
c. Enter in your security code – the default security code is 00 00 00.
d. Using the Arrow keys, scroll through the options until you find the option View IP Address – press Enter.
e. The current IP address of the clock will appear. Press Enter.
f. Enter the desired IP address including leading zeroes if needed. (For example .076 etc.)
The IP address in this Example is: 169.254.241.230
g. The clock will display IP Address Set Successfully.
h. Enter the Subnet Mask as 255.255.000.000
i. The clock will display Subnet Mask Set Successfully.
j. Enter the Gateway as 000.000.000.000.
k. The clock will display Gateway Address Set Successfully.
l. Enter the DNS as 000.000.000.000
m. The clock will display DNS Address Set successfully.
n. Press Clear to exit out of Supervisor Mode.
o. To log into the time clock open a web browser on your computer, and in the address bar type in the IP address of the clock and press Enter.
Example: 169.254.241.230,